

How To Do Word Animations In Premier Pro
At that place are a lot of elements that tin take your video project to the adjacent level such every bit music, effects, colour grading, and titles. For some editors, titles are just the text that appears on-screen telling the view the proper name of the film, or who made it, merely titles can exist used for so much more.
You can use animated text for opening titles, credits, fourth dimension and location information, lower thirds, and even displaying on-screen dialogues. We will accept a detailed expect at the various Premiere Pro text animation styles, and how they can be used to help reinforce themes and narratives in your movie. And then, let'southward dive into the steps on how to animate text in Adobe Premiere Pro CC!
Part i: How to Add Text Animation in Premiere Pro
There are several ways to add titles to your project, each giving you different options for how yous can command and manipulate the text.
Step 1: Add Text Using the Type Tool
Adding a title to your project is actually like shooting fish in a barrel, and can be done with just a few clicks.
- In your project select the T tool.
- Create a text box in the viewer and blazon your titles.
- In the Effects Controls panel, you tin can change the font, size, alignment, and colour of your text.
For a deeper wait into how to add and format text, cheque out this Premiere Pro tutorial.
Step 2: Use Pre-Animated Templates
The Essential Graphics panel offers a range of pre-animated text templates, which you tin customize in various means.
- In the Graphics tab, open up the Essential Graphics console.
- Browse the title templates until you observe one you similar.
- Drag and driblet it to your timeline, and place it to a higher place the prune you wish information technology to appear on.
Once you've selected a template, hither'south how to edit it:
- Double click the text on-screen to edit.
- Select the title in your timeline, in the Essential Graphics panel. The various customization options volition announced.
- Edit the Font, Color, and Size, along with any elements or effects included in the template graphic (such as boxes and lines around the text).
Pace three: Customize Your Blitheness Settings
If the Essential Graphics template isn't quite right, in that location are a number of things you can exercise to customize the animation from within Adobe Premiere Pro.
- The get-go step is to look at the keyframing of your chosen graphic — select the graphic in your timeline.
- In the Effects Command console, open up the keyframe box by grabbing the edge and sliding to the right.
- To slow down the blitheness, grab the keyframes and spread them along the timeline. To speed it upwardly, drag the keyframes, so they are closer together. Click the drib-down side by side to the property which has the keyframes to open upward the Velocity controls.
- The velocity controls the variable speed of your blitheness — you can suit elements like how chop-chop your title comes to a stop.
Part 2: Use Effects for Cool Text Animations in Premiere Pro
The Essential Graphics are a great solution to animative your titles in Premiere Pro, but what if you desire more than control? No problem! Using the layer properties, titles can be animated in the same way as your clips, images, and other graphics. Here are a few elementary animations you can do.
i. Fade
The fade is a classic animation that is incredibly simple. You might not consider the fade to exist an animation, but retrieve of how your titles would look only appearing on-screen. When you don't desire a large flashy animated title, the fade is your best friend.
- Select your championship in the sequence.
- Find the Opacity settings in the Effects Control panel.
- Identify the playhead about a second into your championship.
- In the Furnishings Control console, click the stopwatch side by side to Opacity.
- Move the playhead to the get-go of your title.
- Decrease the Opacity to 0%. You volition encounter a new keyframe is added indicating the start of the animation. Y'all can adjust the speed of the animation by dragging the keyframes further apart.
ii. Scale
Calibration is another holding that can be manipulated quite hands to create fun and dramatic titles. For example, if you want the text to offset small-scale and get bigger or modify shape, here's how that digital wizardry is created.
- Select your title in the sequence.
- Detect the Scale settings in the Effects Control panel.
- Place the playhead about a second into your title.
- In the Effects Command panel, click the stopwatch next to Calibration.
- Move the playhead to the start of your championship.
- Shrink or enlarge your title appropriately.
Bonus! You tin add a bounce to your text by adding additional keyframes and adjusting the velocity.
three. Position
For this last animation, nosotros are going to piece of work with the position tools. You lot can change the position of any layer in your project, but this will affect everything in that layer. For slightly more than advanced title blitheness, try separating your titles onto separate layers and animating them independently.
- Identify your playhead where you want the animation to end, select a title layer and click the stopwatch adjacent to the Position belongings in the Effects Control console.
- Keeping your playhead in the same position, select your second title and click the stopwatch. This will make certain both titles finish their blitheness at the aforementioned fourth dimension.
- Place the playhead where you want the animation to start, and change the Position of each title in turn so that they come from different sides of the screen.
Let's add some opacity effects to this blitheness:
- Identify the playhead in between the two Position keyframes, and select the Opacity stopwatch.
- Place the playhead over the first Position keyframe, and decrease the Opacity to 0%.
Using these three properties, you tin create a wealth of text animations for your projects. Endeavor playing around with timing and mixing blitheness effects for different results.
Function 3: Use Later on Effects with Dynamic Link to Use Titles in Premiere Pro
While you can create basic animations in Premiere Pro, Later Furnishings is the plan used to create animated titles and essential graphics. You lot'll find it likewise has many more text animation effects! Fortunately, Adobe has fabricated information technology incredibly unproblematic for you to create After Effects titles, and utilize them direct in Premiere Pro.
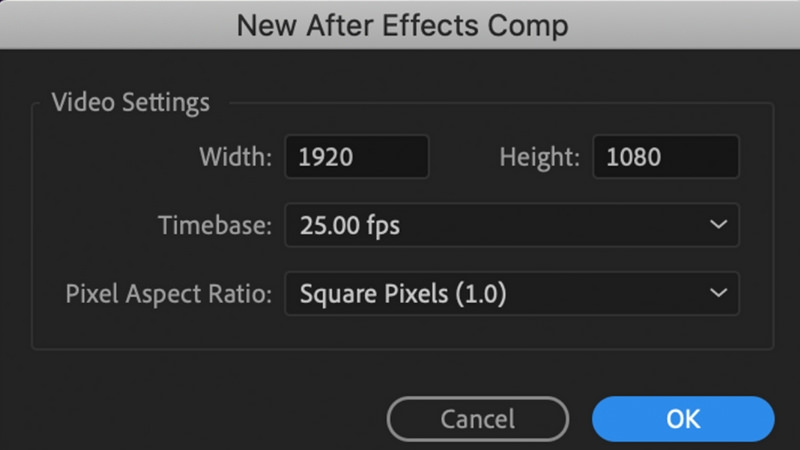
- From your Premiere project, select File > Adobe Dynamic Link > New Afterwards Effects Limerick.
- Make sure the new composition settings are the aforementioned as your electric current project and click OK.
- Once After Effects has opened, create your animated titles and save them.
- Your new title will appear in your project browser equally a clip. Elevate and drib it to your timeline, and return it to play. You can return to the After Effects project at any time to update the championship.
In that location are many ways to add movement to your text and titles in Premiere Pro. Animating text elements tin give your videos a more than professional feel, and assist tell your story in an exciting and original way. Now that you know how to use Premiere Pro for text animation, exercise and get creative!
Source: https://motionarray.com/learn/premiere-pro/premiere-pro-text-animation-tutorial/
Posted by: readingharays.blogspot.com
0 Response to "How To Do Word Animations In Premier Pro"
Post a Comment